
![INSTRUCCIONES PARA HACER UNA MÁSCARA PROTECTORA [HOW TO MAKE A PROTECTIVE FACE MASK]](https://images.squarespace-cdn.com/content/v1/5d18c260b7d7930001f78c52/1585334756293-M3INP5QGJPGKNDMB16CC/IMG_20200327_134949%7E2.jpg)
INSTRUCCIONES PARA HACER UNA MÁSCARA PROTECTORA [HOW TO MAKE A PROTECTIVE FACE MASK]
Podemos decir que es el elemento indispensable en éstos días. No hay dudas, el contagio está en el aire, entre el espacio de las personas unas a otras, en las oficinas, en espacios cerrados con poca ventilación, en lugares donde hay cierta afluencia de personas como el cine, restaurantes, oficinas médicas, supermercados, pasillos de edificios, buzones de recibir las cartas donde vivimos, áreas de desperdicios, elevadores, parqueos de los edificio privados y multi-familiares; solo por mencionar algunos con afluencia de personas de todas las edades y usualmente durante todo el día y la noche.
Todos somos vulnerables al CONTAGIO; pero hay personas con muchos más riesgos que otras, hablo de las personas mayores y los niños. Entonces es muy importante seguir TODAS las recomendaciones que se están dando en los canales de TV, programas de salud, oficinas médicas, etc. ES MANDATORIO Y DE SENTIDO COMÚN APLICARLAS SIEMPRE Y NO IGNORARLAS.
Pedir ayuda si es necesario; ¡y siempre tener estos teléfonos a mano y en la lista de sus celulares en caso que se presentara una EMERGENCIA!
Entonces, aquí, compartiremos con usted nuestra experiencia paso a paso para hacer una mascarilla casera utilizando los recursos disponibles por JOANN Fabric and Craft Stores en inglés y español.


Descargue el patrón proporcionado por JOANN Fabric and Craft Stores disponible en línea de forma gratuita.
Corte el patrón para eliminar el borde, dejando solo la máscara de 9 x 6 pulgadas cuadradas.
Ahora es el momento de cortar la tela. Coloque el patrón a lo largo del pliegue de la tela y corte a lo largo del perímetro izquierdo, superior y derecho. Asegúrate de cortar la tela del revés.
Repita el mismo paso usando la tela de interfaz o fusible que alineará el interior de la máscara.
Ahora debe colocar la interfaz en el lado interior del cuadrado de tela y doblar por la mitad. Use su plancha para asegurar un pliegue plano y preciso. Asegúrese de tener el doblez como el borde largo (9 pulgadas) y los lados abiertos como el borde corto (6 pulgadas).
Corte dos tiras de bandas elásticas de 7 pulgadas.
CONSEJO: Si no tiene un ajuste elástico o se agota, ¡puede usar la banda elástica de una vieja máscara para dormir!
Comience marcando la primera costura a lo largo del borde largo superior (opuesto al pliegue), dejando una sección entre 2-3 pulgadas abierta en el medio. Puede usar alfileres o creo que marcar la abertura con un bolígrafo permite una costura más fácil ya que no interfiere con el prensatelas.
Una vez que cose esta costura, prepare las bandas elásticas a lo largo de cada borde corto, insertando con cuidado la punta de la banda metiéndola en cada esquina y asegurándola con un alfiler. Nuevamente, asegúrese de insertar los pasadores a cierta distancia del borde para permitir una costura más fácil debajo del prensatelas en la máquina.
Ahora, gire la máscara al revés, insertando su dedo en la costura abierta. Planche la máscara para obtener bordes bonitos, nítidos y aplanados.
Luego, prepare la máscara para crear los pliegues, alineando el patrón a lo largo del borde lateral con las bandas elásticas.
Usando el patrón, puede marcar los pliegues con alfileres, O un método más fácil es doblar la máscara por la mitad, usar una plancha para asegurarla y luego crear un pliegue superior e inferior, asegurando y aplanando los pliegues con la plancha.
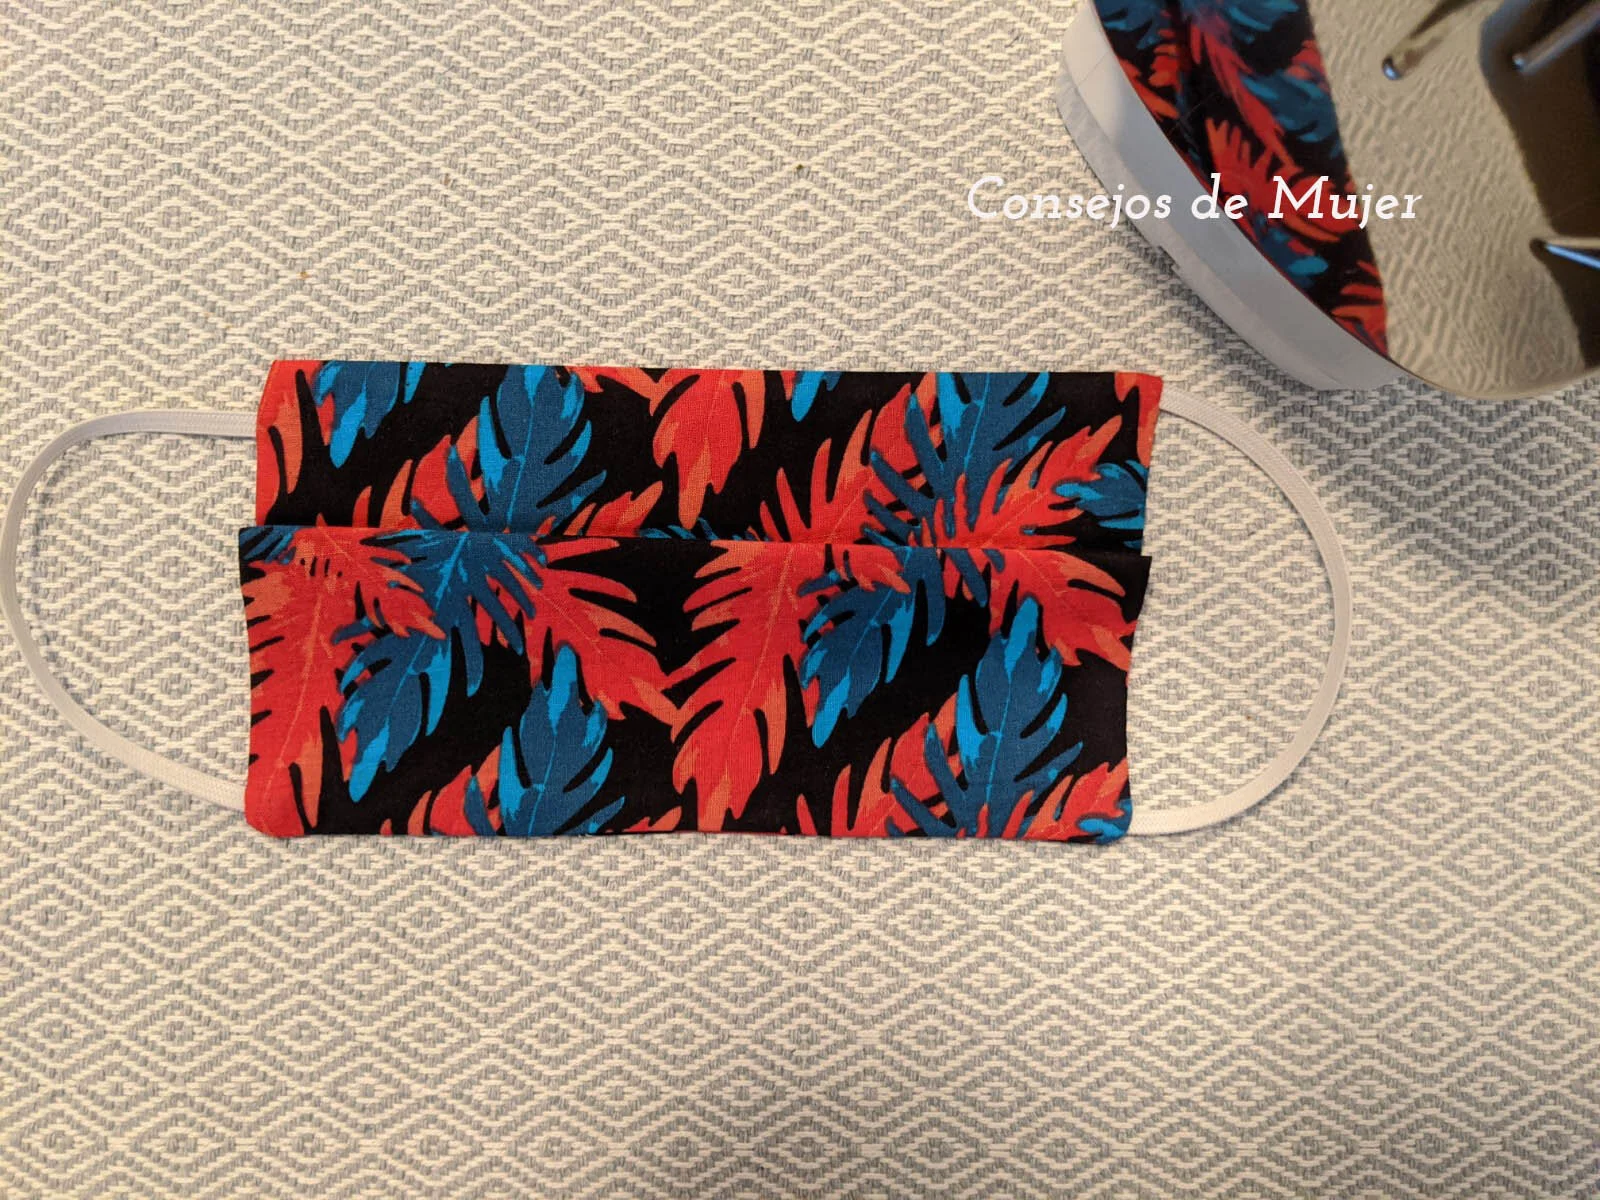
Finalmente, está listo para llevar la máscara, con los pliegues planchados y doblados a su máquina de coser para la costura final a lo largo de todo el perímetro de la máscara.
¡Dale a tu máscara una última presión con la plancha y listo! ¡Acabas de hacer tu primera máscara!
¡Muchas gracias a la iniciativa Make to Give de JOANN por el patrón del proyecto y el video instructivo! Cuando haya terminado, puede donarlos en cualquier tienda JOANN. Esto ayudará enormemente a las instalaciones que son escasas debido al brote de COVID-19.
¡Buena suerte y mantente saludable! ¡Asegúrese de compartir su imagen con nosotros y con JOANN en línea y a través de las redes sociales!
****
[ENGLISH TRANSLATION]
Here, we will share with you our step-by-step experience in making a homemade face mask using the resources made available by JOANN Fabric and Craft Stores in Spanish and English.
Download the pattern provided by JOANN Fabric and Craft Stores available online for free.
Cut the pattern to remove the border, leaving only the mask 9 x 6 inch square.
Now its time to cut the fabric. Place the pattern along the fold of the fabric and cut along the left, upper and right perimeter. Be sure to cut your fabric inside out.
Repeat the same step using the interfacing or fusible fabric which will line the inside of the mask.
Now you should place the interfacing to the interior side of the fabric square, and fold in half. Use your iron to ensure a flat and precise fold. Make sure you have the fold as the long edge (9 inches) and the sides open as the short edge (6 inches).
Cut two 7-inch strips of elastic bands.
PRO-TIP: If you do not have elastic trim or run out, you can use the elastic band of an old sleep mask!
Begin by marking the first seam along the upper long edge (opposite the fold), leaving a section between 2-3 inches open in the middle. You can either use pins or I find that marking the opening with a pen allows for easier sewing since it does not interfere with the foot presser.
Once you sew this seam, prepare the elastic bands along each short edge, carefully inserting the tip of the band tucking it into each corner and securing it in place with a pin. Again, be sure to insert the pins at a distance from the edge to allow for easier sewing under foot presser on machine.
Now, turn the mask inside out, inserting your finger into the open seam. Iron the mask to get nice, crisp and flattened edges.
Next, prepare the mask to create the pleats, by lining up the pattern along the side edge with the elastic bands.
Using the pattern, you can mark the folds using pins, OR an easier method is to fold the mask in half, using an iron to make it secure, and then creating an upper and lower pleat, securing and flattening the folds with the iron.
Finally, you are ready to take the mask, with the ironed and folded pleats to your sewing machine for the final seam along the entire perimeter of the mask.
Give your mask one last press with the iron, and voila! You have just made your first mask!
Many thanks to the JOANN's Make to Give initiative for the project pattern and instructional video! When you're finished, you can donate them at any JOANN store location, local facilities in need, or use at home. This will greatly help facilities that are in short supply due to the COVID-19 outbreak.
Good luck and stay healthy! Be sure to share your picture with us and with JOANNs online and via social media!


